

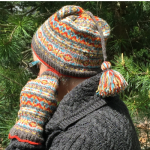
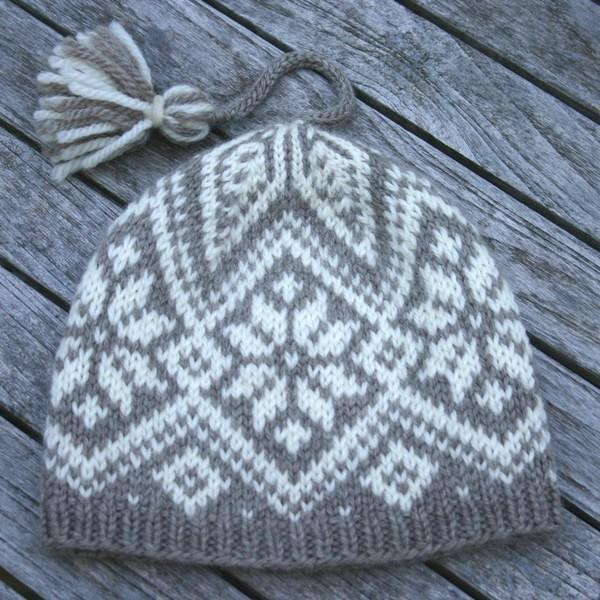
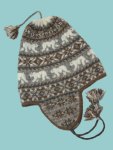
Free knitting pattern for a quick, warm, adult-sized earflap hat – “North Shore Hat”.
Here’s a free pattern for a super-quick, adult-sized earflap hat I made for my winter beach hikes. I used wonderfully soft and warm Dale Hubro 100% pure new wool. It’s “bulky” weight, so it knits up in a blink. (I made this hat in one day, and I’m really not a very fast knitter.) Hope you have fun with it!
UPDATE, September 2018: This free pattern has been moved to the free pattern page on Mary Ann’s new knitting website, MaryAnnStephens.com.
February 9th, 2015 – Today, I’ve updated the PDF with a new version which includes a bunch of explanatory notes which will hopefully clarify the earflap joining process. Since most of my work involves colorwork, I often hear knitters complain when they have to weave in loose ends. So, with the original version of this pattern, thinking I was writing it for my usual, experienced customers, I tried to avoid loose ends, when possible. But, doing so required a shift in direction at one point and a partial round on one side. Not ideal, especially when so many other websites started sending folks here, referring to this pattern as a “beginner’s” pattern! I wouldn’t call it a beginner’s pattern, but I’m happy to help lure advanced beginners into the joys of charted knitting. To that end, I’ve changed the process slightly: Now, you’ll make one extra cut in the yarn and you’ll shift your stitches around a bit to get back to the beginning of the round. But, as I hope you’ll agree, doing so makes the layout much clearer. And, hopefully, the notes will further encourage those of you who are new to charted knitting.


Love this pattern! I keep coming pack to it to admire it. I think this might become my new hat next winter! Thanks for offering the pattern!! 🙂
My pleasure! I’m so glad you like it.
Thank you! I was looking for such pattern for so long!
I love the hat. How do I get the chart for the pattern?
Click on the link that says “North Shore Hat” and the file will come up. It’s a 3-page PDF and the chart is on the 3rd page. You can save your own copy of the PDF to your computer / device. Or, simply bookmark the page and come back to it whenever you need it – whatever works!
Where is the pattern ? Could not find it. Really love the hat.
Click on the link that says “North Shore Hat” and the file will come up. You can then save your own copy of the PDF to your computer / device. Or, simply bookmark the page and come back to it whenever you need it – whatever works!
I love it. I don’t suppose there is a baby/child size available.
Sure! Finer yarn + smaller needles = smaller hat.
Hy! I am Aparna I like the hat pattern very much. Thank you!
I just want the printed directions. Not the video if that’s possible.
for the North Shore Hat
Video? There is no video in the PDF file, only a knitting pattern with a knitting chart.
Could I just double a worsted weight yarn and use that instead of a chunky weight yarn?
Maybe. You’d at least come pretty close. But, even within a weight classification like “worsted weight”, you could still have some variance. Of course, the 4 st/inch worsted weights will make a smaller / thinner hat than the 5 st/inch worsted weights. As always – you know the deal – swatch to know for sure!
I would love to make the hat, how do I get the pattern??
Click the link that says “North Shore Hat” and the PDF will come right up.
On the earflaps, do you purl on the WS? When you are on a purl row and you make one, do you purl the new stitch or knit it? Thanks!
Short answer: Just follow the pattern. Long answer: The first item in the chart legend directs you to knit the main stitches on the right side and purl them on the wrong side. It’s certainly possible to “knit back backwards”, rather than purl, but that’s a rarified technique that’s unnecessary here (although it can be very useful in some situations.) The m1’s were done the same way on each side (otherwise, I would have used different symbols/descriptions for an alternate method.) There’s nothing wrong with using mirror reflection M1s and reversing them on the wrong side, if you like going to such trouble; in some of my colorwork designs, I do just that, for such details can make or break colorwork layouts. But, I think it would be unnecessary overkill here that would never show up. Moral of the story: Follow the chart legend, along with the text directions, and your hat should match the sample. Or change it to your heart’s content. Whatever works best for you! 🙂
Thanks, I found out how to Make one purl-wise and that worked. I’m still learning this craft. I really like the look of this hat and appreciate the pattern, its a fun challenge for me. However, I’m stuck again on how to work in the left earflap. Did you use the Kitchener stitch to graft the two, or is there something I’m missing? Thank you so much for being so helpful!
There is NO kitchener stitch, or grafting, involved with this hat. I guess what you’re missing is that you haven’t worked through the “Joining the Earflaps” section immediately after you’ve made the Left, then Right, earflaps. Try that out and then, if you have questions about what’s going on in that section after giving it a go, let me know.
It’s a fine inclination you have – to try to understand what’s going on in a pattern before proceeding. But, when you’re encountering something new in knitting, it’s usually best to blend that cautious inclination with some vigilant trials, in which you closely observe and take note of what’s going on while you’re trying it out. When you’re learning new techniques, all the words in the world can be meaningless, compared to actually doing the knitting.
Actually I have worked it up until that point and I don’t know what you mean by “work sts #22 through #35 across left earflap”. How do I blend the separate earflap into the yarn I’m working? I agree with your advice about just jumping in and that’s what I’ve been doing, but I just don’t see how to do this step. I really do appreciate your help!
Never mind. I got it.
I’ve been looking for this sort of earflap shape! Thank you for offering it.
Ruth
My pleasure, Ruth! I hope you enjoy it.
I’m confused about the positioning of the end of row marker. I’v completed Rows 1 and 2 of the earflap joining chart and have casted on 19 stitches. After I join circularly it states work to EOR marker. What pattern am I following when it says work to EOR?
Let’s jump back a little and look at how the hat is constructed. The earflaps, plus the 2 earflap joining rows, are worked flat, i.e., back and forth; the main portion of the hat above those sections gets worked circularly. You’re in the spot where we have to transition from working back and forth to working circularly. You’re on the 2nd row of the Earflap Joining Chart, where you’re working on the WS (the “wrong” side / private side / inside), you’ve cast on 19 sts, and you’re wondering how you finish up that row. First, remember, that’s a WS row! If you join the work circularly, you’ll see that your cast on stitches (which will be the front/forehead section) come up next to the wrong side of the left earflap. You completed your textured chart work of the inverted V shape on the both earflaps when you worked the Earflap Joining Chart Row #2, and you can see that there’s no more texture work to do until Row / Round #3 of the Main Chart, so you’re just working in stockinette stitch now, and since you’re on the WS, that probably (but not necessarily – hence the term “work” rather than “purl”) means you’re purling until you get to the EOR, which, as mentioned in the pattern, corresponds to the center back of the hat / head. Once you reach that EOR, you’ll start the Main Chart. Three repeats of the Main Chart = 1 round – not 1 row, but 1 round – so we know it’s knit circularly. I think 99.999% of the population will opt to switch direction at the EOR, as the Main Chart work begins, so that the remainder of the hat can be knit on the RS, in typical circular fashion. There’s a very tiny jog, as you switch direction at the EOR, but it’s smaller that way than the alternative:
Of course, as with any pattern, there are other ways we could do this. For instance, the way it’s been done, you end up working an extra, partial row over the left earflap, on your way to the EOR. Nobody seems to notice that difference, and everybody seems to hate weaving in loose ends, so that’s what I went with. Some knitters might prefer to cut their yarn, slip the left earflap sts, work a flat RS row of stockinette in place of the first row of the Main Chart, then join the work circularly. While that gives you exactly the same # of sts above each earflap, it also gives you 2 more loose ends to weave in, plus a bit more joining work to do at the center back. Pick your favorite method!
Hello, I have finished the hat and love it!! I am ready to do the edging but I honestly can’t figure out how!! Help!?!?!?
Hi Melanie, Glad to hear you’re loving your hat so far. I’ll definitely help you figure out the edging. But first, you have to help me figure out which point has you stuck. Or have you tried it yet? It’s not uncommon that folks will bridle when they first encounter attached I-cord directions – they’re kinda “different”. But, it’s really easy, once you get the hang of it. I’m sure you can CO 3 sts onto a dpn, right? And no doubt you can pick up a stitch along the center back edge and see that that gives you a total of 4 sts on the dpn. Sliding them to the opposite end of the needle is easy peasy, and I know you can knit 2 sts, then k2tog, to bring your dpn stitch count back down to 3, then do it all over again. So, if you haven’t tried it yet, dive in! And if you have, but you’re stuck, let me know where.
That makes more sense:) I will try it and let you know how I do!
Great! And if you would, please tell me just what part now “makes more sense”. To my mind, I’ve simply restated the pattern, nearly verbatim. But, if there’s a bit that’s better worded one way than another, I always like to know which way makes things clearest.
Pingback: Free Knitting Pattern – North Shore Hat – UPDATE | Two Strands
Hi Just finished knitting this hat. Thanx for all the tips. I’ve learned a lot through knitting the hat. It is a very unique hat which I’m sure to knit again. And thanx for the free pattern!
O.k., can we talk about the pattern of what you are wearing in your photo? Itnlooks like some sort of fabulous mosaic knit kimono. Is that one of your patterns?
Yep, that’s my “Rosalia” sweater, one of my designs. I knit the one I’m wearing in that photo. You’ll see from one of my old blog posts that I had a longer, more neutral one knit for me by a test knitter, too. You can get all the scoop in these old posts:
Thank you so much for allowing us to use this beautiful pattern! I am currently knitting hats for my local hospital OB and wondered if you have a version of this hat without ear flaps and that would fit a newborn?!
Thanks so much
B
Hi Beth! I’m so glad you like the hat. Sure, there are ways to make it for a newborn, and you can do it without the flaps. If you knit it to a gauge of 4.5 sts/inch – a standard worsted weight gauge – you’ll end up with a hat that’s 12″ in circumference, which is pretty good for a small-to-preemie hat. If you use aran weight yarn and knit it to a gauge of 4.0 sts/inch, you’ll end up with a hat that’s 13.5″ in circumference, which would be pretty good for the larger newborns. To skip the earflaps, using a needle one size smaller than the needle you used to get your desired gauge, cast on 54 stitches; join circularly; knit 3 or 4 rds (for a rolled brim); change to the larger, i.e., main gauge, size needle and continue the pattern as written from the “Main Chart” onward.
Hello! LOVE this pattern. I am done with earflaps and have the first 14 stitches plus 7 CO of earflap joining row… I am stumped as to how to finish stitches 22-35…that aren’t there. I know I must be missing something! PLease help, thank you!
Hello! I cannot figure out the first row of the earflap joining row. I am have CO7 stitches after the first 14… how do I continue working stitches 22-35? THANK YOU 🙂
I am not sure how to work stitches 22-35 of ear flap joining row 1. I have stitched the first 14 and CO 7 stitches… now what? how do I move forward? Thank you!
It might help you to re-read the preceding paragraph which starts with “Joining the Earflaps” and goes on to explain a bit about the construction of the section you’re on. While doing that, look at the chart page and notice that the earflap charts line up right under the Earflap Joining Chart rows you’re working on. That’s no coincidence – you do actually knit those Earflap Joining rows right above the earflaps, as shown, with the 7 CO sts joining the whole piece in the middle. If you’ve cast on those 7 sts by working in the same direction and using the e-loop method, as the pattern suggests, all you have to do is continue along the very same chart row, right over the next earflap, as the pattern says, until the earflap’s end, which will also be the end of your chart row.
Okay, thank you!! I considered that but it didn’t seem like 7 CO stitches would be enough space between the two earflaps.
Love that you used Hubro for this. I made a little child’s vest out of this yarn and it was beautiful and made me look like a better knitter than I actually am! Unfortunately the yarn store where I bought the yarn went out of business this past year, so I will have to try another source. Thanks for the pattern!
Hi Chloe! I’m sorry to hear your LYS went out of business. I like Hubro, too. In fact, I like to so much that I sell it on my Kidsknits.com site. Here’s my Hubro page. Hope that helps!
Love this pattern! The pattern is so well written. Can’t wait to try it! It will be one of my mom’s Christmas presents. We live in Maine, where winters are cold. She’s elderly, but likes to get outside, and this will keep that damp coastal wind out of her ears, as well as being warm and pretty. Thank you so much for giving us this pattern.
My pleasure, Mary! Thanks for your sweet comment – it made my day! 🙂
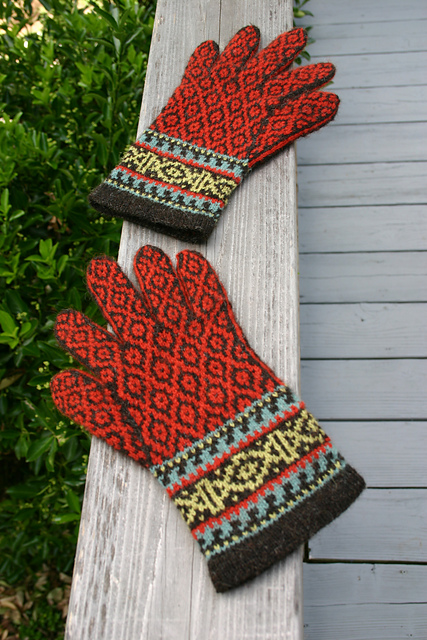
Pingback: Free Knitting Pattern: Mittens in a Blink | Two Strands
Are there adaptations that can be made for a 12 month old hat? thanks for any info.Joan B.
Of course! As with any knitting pattern for any project, thinner needles and / or thinner yarn will give you a smaller result. Then, the question arises: Just how much smaller do you want it? Babies’ heads grow tremendously through their first two years. More than a few two-year-olds can wear adult-sized hats! Most toddlers would probably do well with North Shore Hats knit with a thinner bulky weight, or heavy aran weight, yarn. (Hubro is “super bulky”).
Hmmmmm……
The free pattern is not on the links you have mentioned….. 😓
Hi Maho, I just checked the second link, which leads to my new website, https://maryannstephens.com and, if you click through on the “free patterns” link at the top of any page on that site, you’ll get to my free patterns page, where this, and all of my free patterns, can be found. So it looks like that link looks fine. However, I did see that, on the link that goes directly to the free patterns page, instead of my new homepage, there was a “.com” missing in the link, so that one was not working and I apologize for that. It has been fixed. I hope you enjoy the pattern!
Do you do charts only I am not into charts Sorry I did one once and as many years that I have been knitting I have stayed away from them
Every designer who creates a workable knitting chart has to know what is being done with every single stitch within the chart so, of course, anyone who creates knitting charts has the ability to tell you – graphically, verbally and in text – exactly how to knit that design. Me, too! But, the point of writing a pattern is not to detail the knitting process redundantly, in every format possible; the point is to detail it in the clearest, most succinct manner possible. Color work, lace and texture knitting almost always involve the use of a chart for part, or all, of the pattern. As you’ve probably seen, charts have become more and more popular lately. For good reason! I use charts extensively because they are a much less ambiguous and vastly more efficient way of representing a design, as opposed to writing out the longhand text. I also enjoy the fact that charts can often be used by others, no matter what language they speak. Those who have invested what’s usually a very small amount of time into understanding the workings of knitting charts are nicely rewarded when they see that, once they’re proficient in reading charts, they can understand what’s going on with a design in the blink of an eye – a much happier process than digging through multiple paragraphs densely filled with abbreviations and, all too often, typos.
In the time that I wrote out that paragraph, yes, I probably could have written out the text for each of the rows of my free chart. But, I don’t write patterns to transmit my designs in every manner possible; I write them to explain my designs in the clearest, the most succinct – the best – manner possible. Rather than give you what you’ve asked for, I’ll do the kinder thing: If you’re serious about wanting to knit this design, take a look at the instructions and tell me what part(s) you don’t understand. I’ll be happy to answer your questions and hopefully, along the way, you’ll soon see some of the many advantages of knitting from a chart.