
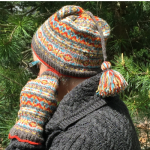
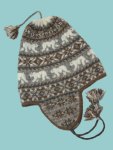
 Some folks in my Two Strands Ravelry group recently asked me to recommend a great project for a first try at stranded knitting. I could point out a few fine places to start but, to tell you the truth, I couldn’t think of a perfect stranded starting point. So, I decided to create one. And I didn’t have to look too far for my inspiration, either – check out the banner on my Ravelry group, Two Strands, and you’ll see what I mean.
There are several virtues which I think are important for a first-time strander’s project: First, it should be a simple motif with consistent repeats and no long floats. Of course, it should be something useful and attractive. It should be unisex and it must be free, to openly welcome anyone to give it a try. And “fun” would be nice! I think I’ve squeezed all of those virtues into my Two Strands Headband, below. Give it a

Two Strands Headband

try and tell me what you think!
Two Strands Headband
Average adult size; finished circumference = 20”, allowing for 1 to 2 1/2” negative ease.
Suggested yarn:
3 50-g balls of Dale of Norway Falk washable wool yarn, each in a different color.
Colors used in sample:
A – Deep blue #5545; B – Purple #5036; C – Lavender #5224
See more colorways below. All shades of Dale of Norway Falk yarn are available through the designer’s retail knitting website, Kidsknits.com
Suggested needles:
Either a 16” long circular or a set of double-pointed needles may be used.
Two different sizes of needles are required – larger for the outside of the headband, smaller for the headband lining. To get the main gauge which is used for the outside of the headband, most knitters will want either US 4(3.5mm) OR US 5(3.75mm); however, those who tend to knit quite loosely might want US 3(3.25mm) and those who tend to knit quite tightly might want US 6(4.0mm).
USE WHATEVER SIZE YOU NEED TO OBTAIN THE GAUGE, BELOW!
Once you know which size needle produces the correct main gauge for you, drop down one or two sizes smaller for the inside of the headband. (The smaller the size used on the inside, the snugger the fit.)
Gauge: 24 stitches and 28 rows = 4”/10cm in stockinette colorwork on larger needle.
Abbreviations: K = knit; P = purl; rd(s) = round(s); st(s) = stitch(es).
Instructions:
Using A and SMALLER NEEDLE, cast on 120 sts. Place end of round marker and join work circularly. K 11rds. P 1 rd. CHANGE TO LARGER NEEDLE. K 3 rds. Work Star Chart, below, according to notes in box:
Star Chart:
 copyright Mary Ann Stephens  Two Strands Headband Alternate Colorways - The Tip of the Iceberg |
Work Star chart as follows: Begin at lower right, i.e., row 1 / column 1. Read all rds across right to left. Each square = 1 st to be K in color shown. Once you have K the 12 sts of a chart row, repeat columns 1-12 of that row 9 more times for a total of 10 instances to complete each rd. Complete rds 1 through 13 of Star Chart. |
Using A, K 4 rds. CHANGE TO SMALLER NEEDLE. P 1 rd. K 10 rds. Bind off all sts. Fold upper and lower linings to the inside on the purl lines and sew together each respective cast-on and bind-off st.
If you want to get really fancy, you can cast on using scrap yarn, then K 1 extra rd at the end, don’t bind off, remove your scrap yarn and graft the beginning and end together for a seamless effect. For notes on grafting, see this article on my blog:
https://twostrands.wordpress.com/2007/06/07/grafting-911/
As always, post away with any questions/comments. Happy knitting!

See my Ravelry designer's page!

Join my Two Strands group on Ravelry!
Oh, wait! Hey, don’t go yet! I forgot to show you something. You know, I can’t resist goofing around with endless color possibilities, so take a peek at the first few that jumped out at me…and let me know what you come up with!
Two Strands Headband Alternate Colorways - The Tip of the Iceberg


H- I just found your blog through knittinpatterncentral.com, and I really like the headband! I’m Norwegian, and it was really funny to see all those photos of the Dale sweaters. I think maybe we don’t appreciate it enough here… even though many of their designs are well known and loved. One of the most famous sweaters was “Marius”, a dark blue sweater with a starpattern in white, and with some red stripes. I just learned today that the model from the old Dalepatternbooks, Marius Eriksen (brother of wellknown downhillskier Stein Eriksen) had passed away.
Hey there!
I have been looking for an easy two strand headband pattern and this one is perfect! Would you mind if I used this pattern for a class?
Thanks,
Lizzie
Hi Lizzie! I’d be very happy to have my Two Strands Headband pattern used for your class. Thanks for asking!
Lizzie stole my question! I am often asked to teach classes using stranded knitting technique, but most are so large they are intimidating. Thanks for the great class project!
Hi, This is going to be my first project trying ‘two strand’. How do you join a new color? Is it in the ‘yarn over’? Then do you just leave the 2 extra colors hanging until the next time to ‘yarn over’? Maybe it is self explanatory once I get started?
Dani, “yarn overs” really don’t have anything to do with changing colors. A yarn over is used to create a hole in the fabric, usually when we’re knitting lace or when we’re making a “picot” foldline. In either case, the yarn over is made simply by bringing the yarn from the back of the work toward the front, between the needles; then, it we lay the yarn over the top of the right needle and bring it to the back. A loop with an open bottom is created. When that open loop / yarn over is knit in the next row, a hole occurs where the yarn over was made, since the bottom of the loop was not closed, or connected to the rest of the work.
As for joining in your new color in stranded knitting, your hunch is right, it is pretty self explanatory once you try it. However, there are some things that are helpful to know in advance and there are some additional things you can do to save yourself work down the road.
You can essentially leave things hanging and tuck them away once you’re done knitting. You might find it helps to loosely knot the ends while you’re still knitting away, but you’ll want to undo the knots before you weave in the loose ends, for knots will only make lumps in your work and we don’t want that! Leave enough yarn length so that you can easily maneuver the loose ends, either with a crochet hook or with a tapestry needle threaded with the loose end. Essentially, with the yarn coming from the right, you’ll weave it up and down through the purl bumps on the back so that you’re tracing the path of the stitches to the left and your woven end sits right behind the next few stitches; with the yarn coming from the left, you’ll do the same thing toward the right for a few stitches.
Depending upon the type of yarn you’re using, you might find it faster to weave in the loose ends as you’re knitting. After working the first stitch in a new color, lift the old and new tail ends together up and over the working yarn as you knit the next stitch, then bring them down and under the working yarn as you knit the following stitch. Repeat that process a few times until the ends are secure.
I hope this helps! Have fun!
Mary Ann
I live in Concord, California.
Where can I purchase the yarn to knit this
head band
I don’t live in Concord, California, so I really can’t tell you. Fortunately, we have the internet. Since you like my pattern, perhaps you’d like my yarn store, too. Here is where you can buy the yarn for this headband, from the comfort of your Concord, California home!
Thanks for this pattern! I’ve been knitting seriously for a couple of years now, and this was my first attempt at following a chart. I used brown, white and green, and it turned out just beautifully! Thanks for the inspiration. I’ll definitely be doing some more chart work in the near future!
Oh, good! I’m so glad to hear it worked well for you and I’m thrilled to know we have another chart enthusiast in the fold! Keep it up and have fun!
Hi, I am from India .i have been knitting last 20years. This was my first attempt to knit hair band. My grand daughter liked it. Thanks for lovely pattern
Hi Neeta! It’s so nice to have you here! I’m so glad that you like the pattern and that your granddaughter likes the headband. Thanks for saying so.
i love this simple pattern but cannot for the life of me figure out how to do the graft stitch using 2 circular needles(one is provincial cast on and other are live stitches still on needle) in order to get it seamless. please help if you can.. thank you
Rebecca, I’m figuring auto-correct is up to its usual tricks and you really meant “provisional” cast on, yes? Assuming that, the best I can tell you would be…still be what the pattern says:
If you want to get really fancy, you can cast on using scrap yarn, then K 1 extra rd at the end, don’t bind off, remove your scrap yarn and graft the beginning and end together for a seamless effect. For notes on grafting, see this article on my blog:
https://twostrands.wordpress.com/2007/06/07/grafting-911/
Definitely look at the grafting article. Yes, it was written from the angle of using grafting to correct something; but, if you scroll down, you’ll see step-by-step photos showing you the very same grafting process you’ll need for joining your last knit round with your beginning round (after you’ve removed the scrap yarn, if used.) You’ll position your circulars in the same manner I’ve positioned those dpns. You’ll want your knitting to have the right/public side facing you, you’ll have the colorwork on the inside of the circle and the grafting will take place on the outside of the circle. Once you’re done grafting, you’ll just turn it inside out and it’ll be done.
thank you so much for the response! Yes that is what i was talking about. It probably was the auto correct. I did read the article you had sent and i thought it was only for mistakes so i did over look the whole article. Guess maybe i should go back again and re read the entirety of it. Hope it helps and i can understand it. i tried it last night and it sure didn’t look seamless to me. i do better with a mattress stitch than what i did . lol. I really want to learn this so that i may make one of your beautiful head warmers i saw on raverly
me again!! another question. i do not have a smaller needle that is required for this pattern. just one. so does it matter if you knit the outside and inner lining using the same needle size? May i ask why the inside lining is knit using the smaller needle. This is all new to me and i am wondering why the 2 different needle sizes for the headwarnmer
You can knit any pattern on the planet with any needle(s) you like – there are no rules about that. But, there are plenty of reasons I design things certain ways. In this case, I see that we have two concentric circles – the outside and the inside of the headband – and I know that, in order to get the inside circle to fit smoothly within the outside circle, it must be slightly smaller; hence, the smaller needle(s).
thank you soo much.i really appreciate it. I’m just one of those ocd people who want to know why for everything so forgive me i meant no wrong here. i know your a professional and i love your pattern so this is why i ask you. i really appreciate your speedy response and your help..
Don’t worry about it, there’s nothing to “forgive”. It was a fine question.
Hi, is it possible to make them into scarf but not working in the rounds, curling could be an issue. Thanks.
If you were to knit the Two Strands Headband chart flat, for a scarf, unless you added some stable edging, then yes, the sides would likely curl. But, adding edging would not solve all of your problems. You’d also have the “wrong” side of your work – floats and all – showing on the reverse. That’s not the best look, and not too great for functionality, either, as the floats could get caught on things (unless you knit it wide enough that you could fold its width in half and seam the edges together.) And that’s presuming you could endure knitting it, with every other row purled, on the “wrong” side (unless you’re thinking of knitting it flat on a machine?) It would be far more pleasant to knit (even if twice the number of stitches), and a far more aesthetic and functional result, if you were to knit it in the round. Or, you could double knit it (although double knitting is a relatively difficult technique which often skews, and it’s usually slower than stranded / circular knitting.) If you want to use the chart for a scarf, I’d recommend doing it circularly.
Thank you so much for the explanations & suggestions 🙂