

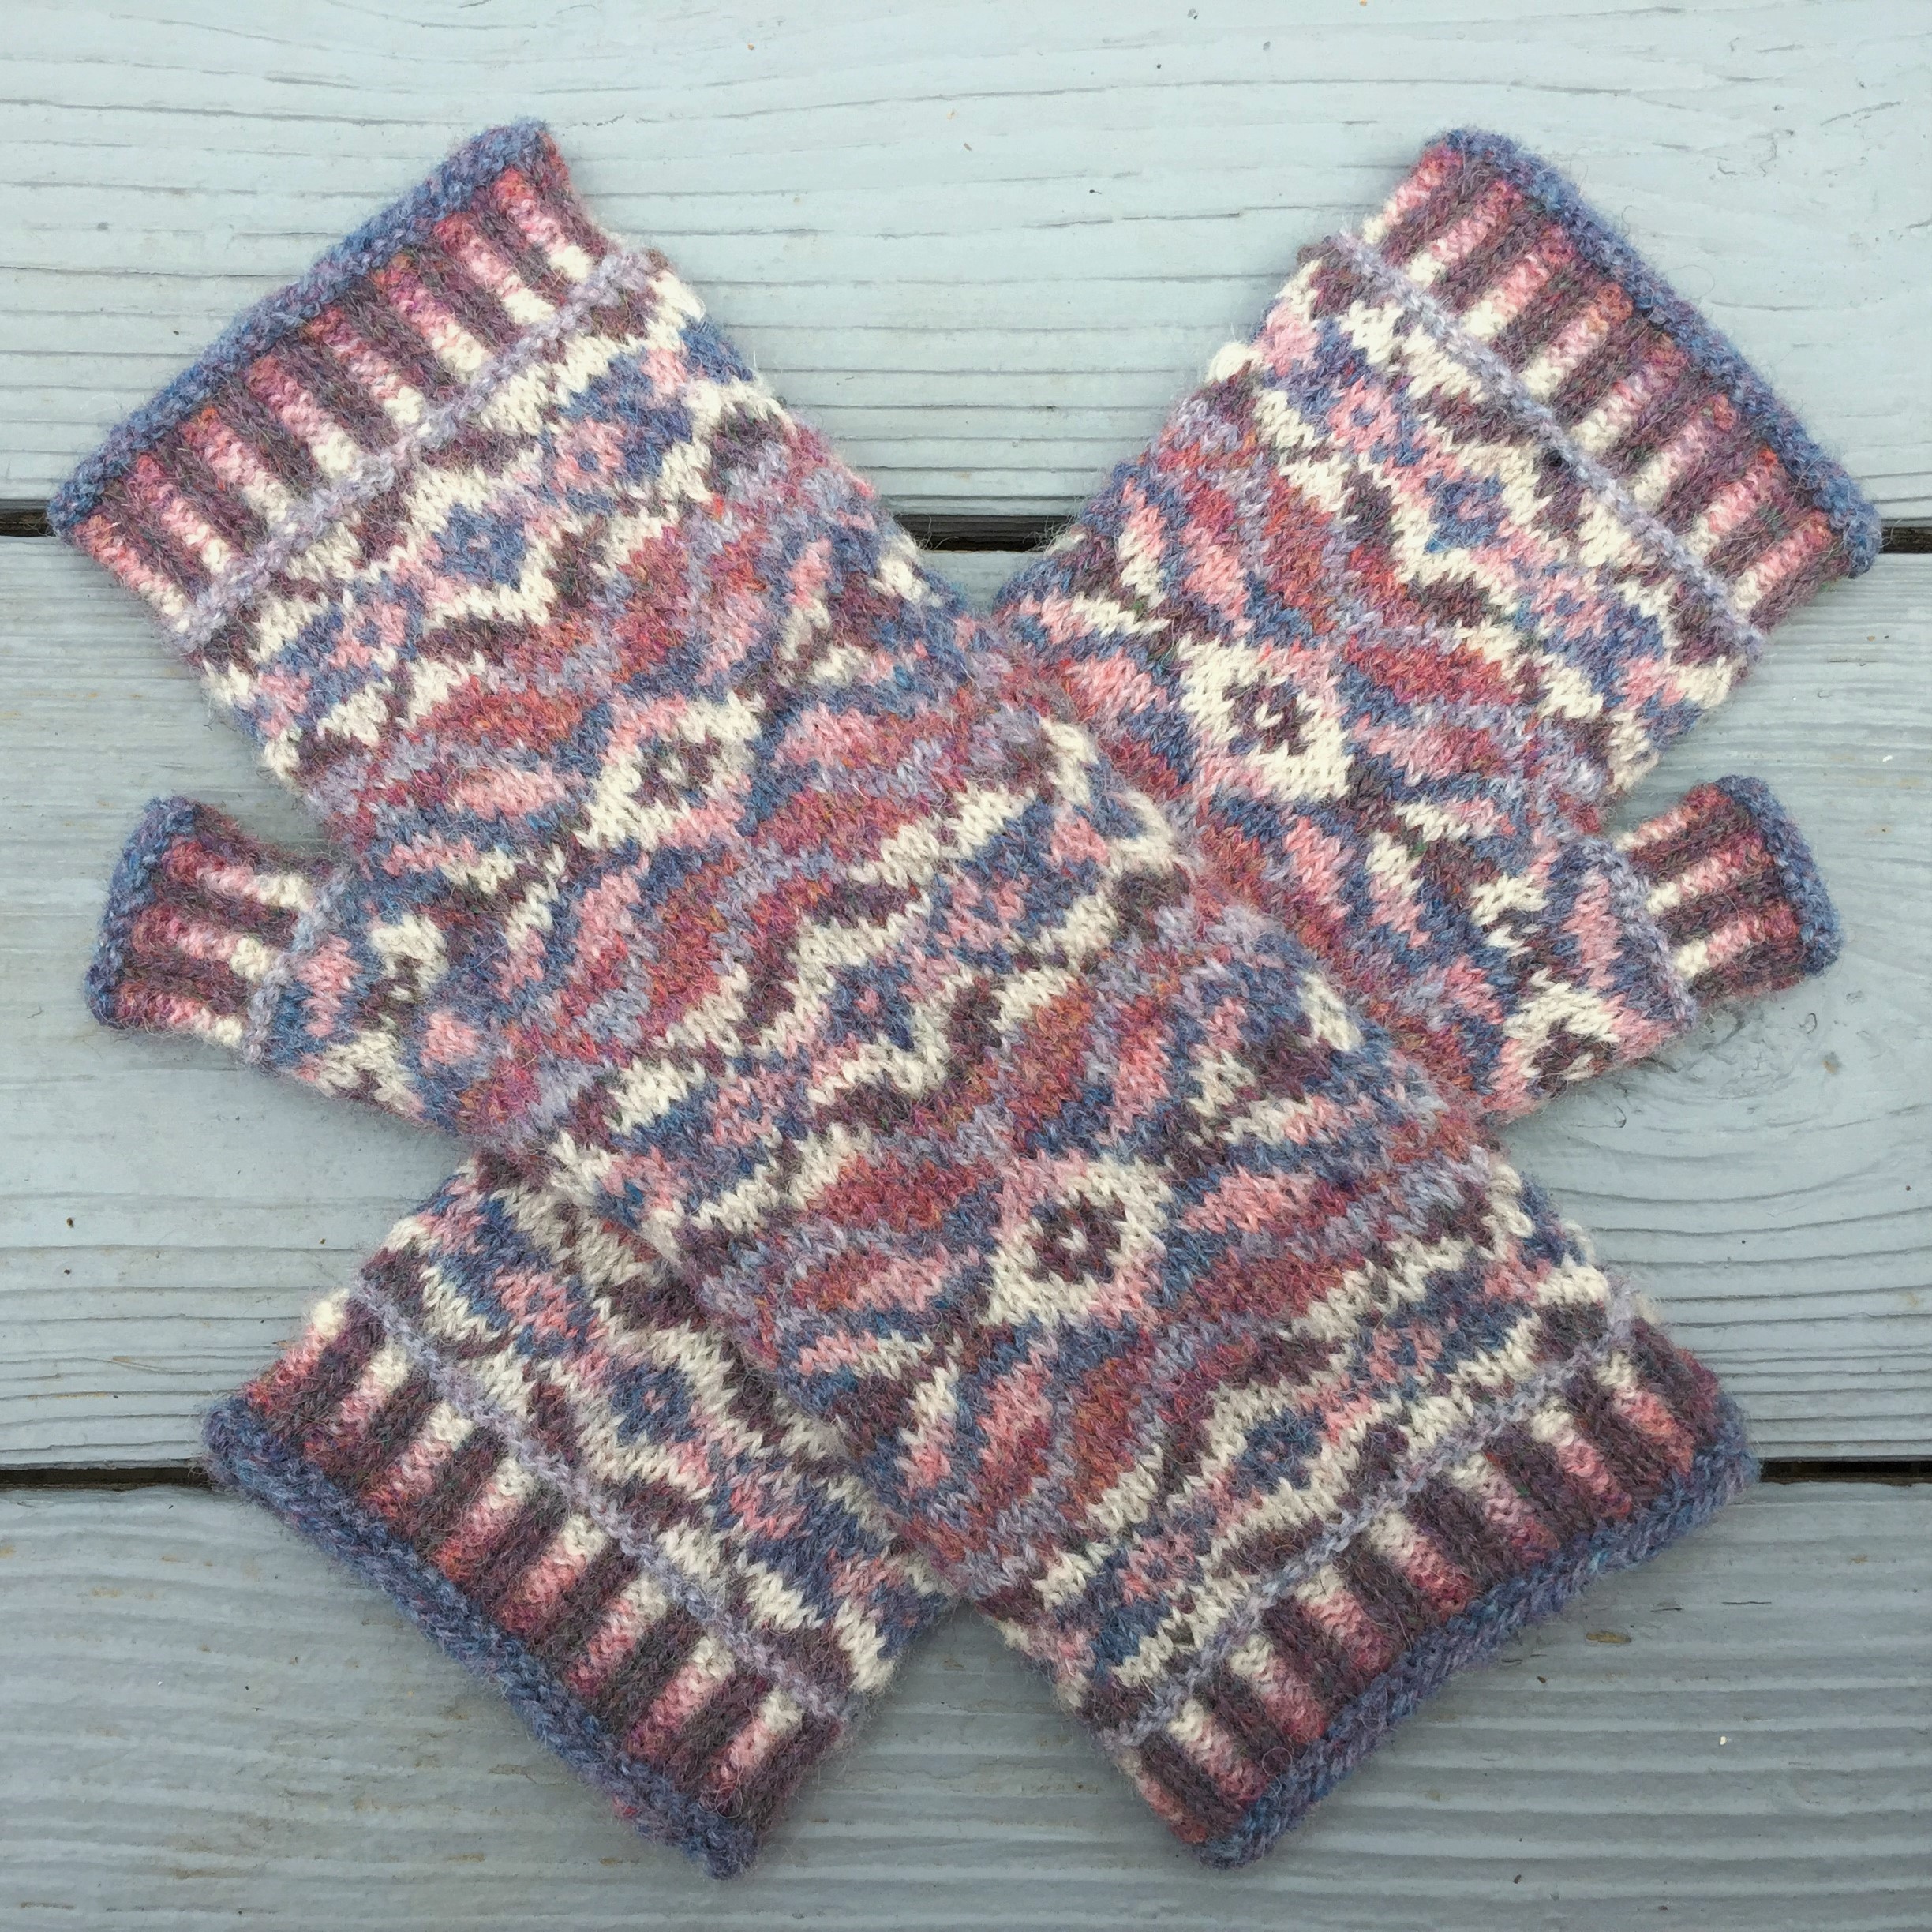
Chrysanthemum Mittens, a free knitting pattern by Mary Ann Stephens
UPDATE: This pattern has been moved to my new knitting website, MaryAnnStephens.com. Here’s a link directly to the free Chrysanthemum Mittens page.
Chrysanthemum Mittens, a free knitting pattern by Mary Ann Stephens
UPDATE: This pattern has been moved to my new knitting website, MaryAnnStephens.com. Here’s a link directly to the free Chrysanthemum Mittens page.


The author hiding out in her Ivy Headband.


Pingback: Lime & Violet’s Daily Chum » Blog Archive » Free Pattern: Chrysanthemum Mittens
I’ve been making small forays into stranded knitting and wanted to find a pattern that was more complex but didn’t scare me off completely. Your pattern is lovely and doesn’t appear to have any scary long floats. And I can’t find the mittens I made last year so I need a new pair! Thanks so much for providing this pattern to us.
Following the pattern, the columns in the checkerboard pattern is only five squares, but in you pictures there are seven. Did you increase it on purpose, unhappy with the pattern, or is there a mistake in the written instructions?
Katie, the pattern is correct as written. It seems you have misinterpreted the instructions. I’ll walk you through them, but first, promise me you will focus on the meanings of the words “repeat” and “more”.
There are 2 rows to each checkerboard square; there are 4 rows and, therefore, 2 checks, to each rendition of the 4-row checkerboard trim instructions. The first time you work those 4 rows, you get 2 checks. You are then told to “Repeat rounds 1-4 two more times” – that will give you 4 more checks, for 6 checks so far. Finally, you are told to “Repeat rounds 1 & 2 one more time” and that will give you one last check for a grand total of 7 checks, both in the pattern and on my mittens. And, by the way, I’m quite happy with them.
Great pattern. Did I miss a link to a full-sized image of the charts? I can’t read the legend in the tiny in-line image.
Thanx for the great pattern!
I think that chart was added before the clickable photos feature was available. You could have gotten around that, at least somewhat, by copying the image into something where you could enlarge it, like Word. But, now that you mention it, we can do better than that! I’ve just edited the image – simply removed the old image, reinserted the same image and, voila, it’s clickable. Have fun!
Thanks VERY much! Now I have a great excuse (as if I needed one!) to head to my LYS for more yarn! …heh
Having a blast knitting these! Started ’em a while back, along with a few other projects, and just picked ’em back up last night. Soooo fun to watch the pattern develop. I’ll definitely have to knit at least a couple pairs, just to play with color.
Thank You!
Pingback: Half Way to Norway! «
Thank you so much for this pattern! These mittens are the prettiest things I’ve ever made!
In your materials section you mention Size 2 needles and Size 4 needles. When do I use them.
Hmmm, not a bad question, although if you read through the pattern first, you’ll see, in boldface, that right after the checkerboard trim, just before starting the main portion of the mitten, you’re instructed to “Change to larger needles.”
Knowing that, you could assume that we begin with the smaller needles. But, you shouldn’t have to assume these things. Sorry about that! I’ve added the words “using smaller needle(s)” to the beginning, so that it’s clear from the start, as it should be. Thanks for raising that point!
Hi there, I’m about to start your mitts and I’ve got a question about the braid. Is this the same as a lateral braid? Not sure what I’m doing when “crossing yarn for current st over yarn for previous st” and visa versa. Chalk it up to my left handed dyslexia 🙂
A “lateral braid”?? Hmmm, well, it does lie laterally (as you can see in the photo), but to my knowledge, there is no official, or even commonly agreed upon, knitting term “lateral braid”, so I can’t give you a simple “yes” or “no” there. As for the second part of your question, if your “not sure” what you’re doing when “crossing yarn for current st over yarn for previous st”, as long as you’re doing what it literally says, don’t worry, you’ll be fine. You’re alternating colors with each st at that point, and it simply means that you continue to bring the new color up over the old color. (Normally, we’d keep them in their positions, and just strand along, but we want these strands of the front (since we’re purling) to angle, so they’re crossing / slanting each time.) They’ll end up getting twisted along the way, but that’s a necessary part of making the braid. If you can feed the twists in the yarn far enough down away from your work and get through the entire braid / crossing round without untangling them, it will pay off in the end, since they cross in the other direction and thereby UNtangle, all on their own, as you work the second braid / crossing round.
Hi!
Is it possible tol link your free patterns to Ravelry?Or JKnit?I wanted to ad the Chrysantemim mittens to JKnit…..
My free patterns are all listed on Ravelry. You can see all of my designs, both free and for-sale, on my Ravelry designer’s page: http://www.ravelry.com/designers/mary-ann-stephens
When I look at the chart I get confused because of the single row of stitches going up in the air on the right sides. What does that mean?? How am I suppose to interpret them?
I suspect you mean a single COLUMN – not ROW – of stitches, yes? That column corresponds to the continuous dotted line that goes along both sides of the hand, from the top of the cuff to the top of the point; there’s a matching dotted line on each side of the thumb, too. Decreases are made on each side of those dotted lines, but the stitches within the dotted line/column themselves, while they do consistently alternate in color, they are never decreased – they continue to the top, unbroken…just as the chart does. They become a real landmark as you’re knitting – they’re right there at the beginning of each half (front & back). While you might think it’s somewhat confusing, if you haven’t used a chart like this before, I think that, once you get into it, it’s actually more helpful this way. It becomes very obvious that you knit your unbroken, dotted sideline stitch first, then work the respective front or back. When you’re working the pointed sections, you’ll knit your dotted sideline stitch, then work an SSK, you’ll knit across to the far side of the chart, ending with a K2tog, then you’ll repeat the same process for the back of the mitten.
It would have been perfectly feasible to draft the chart so that the dotted side line angled to the left, lying immediately to the right of the stepped SSK’s, rather than continued vertically. But, this way, you have a much clearer reminder of what’s going on and it more closely represents the mittens architecture.
Give it a try!